Build a Timber Shed That Doesn’t Twist, Sag or Fight You at the Door
A decent timber shed starts with the parts people usually rush: a level base, a strong floor frame, proper treated structural timber, sensible roof fall, and cladding that is planned before you start cutting. This guide is for someone who can measure, cut, drill, screw framing together, and check square. You do not need to be a carpenter, but this should not be your first time using basic tools.
Most shed problems start before the first wall goes up. The base is not level, the floor frame is too light, the roof fall is guessed, or the door opening is built slightly out of square. You only discover the mistake at the end, when the door rubs, the roof feels wrong, or the shed twists after a wet winter.
This guide is not trying to give one perfect shed plan that suits every garden. A 6x8ft shed is a useful example size, but the real value is learning how to plan the timber, sheets, cladding, roof and door properly. You can scale the method up or down as long as you keep the structure sensible.
- Pent roof only
- Central door as standard
- Structural treated timber frame
- OSB3 floor and roof deck
- Shiplap, loglap, T&G or featheredge cladding
- Material planning method included
This article is for a domestic garden shed used for normal storage. It is not a specification for a habitable room, commercial building, workshop conversion, engineered structure, heavy machinery store or electrical installation. Ground conditions, exposure, load, fixings and local rules can change what is suitable. If the job is unusual, boundary-sensitive, heavily loaded, or involves services such as electrics, get competent advice before building.
What this shed guide is designed to help with
The example build is a simple pent-roof timber shed around 6x8ft, which is roughly 1.8m x 2.4m. The front is the higher side, the back is the lower side, and the roof falls from front to back. That keeps the roof easier to frame than an apex roof and makes the whole guide easier to follow.
The standard layout uses a central door on the front. A central door is easiest to understand, easiest to frame, and works well for a general storage shed. You can move the door to one side if you want more uninterrupted wall space for racking, bikes, garden tools or a mower, but keep the opening properly framed and make sure the door still has enough clearance to swing open.
Before you worry about timber, decide where the shed is going
A shed that sits in a wet hollow will always have a harder life than a shed on a well-drained, level area. Look for somewhere firm, accessible and not constantly holding water. Also think about how you will carry sheets, longer timber and cladding to the build area before the delivery arrives.
For houses in Wales, outbuildings are usually subject to limits and conditions. Welsh Government guidance says outbuildings cannot exceed one storey, single-pitch roof buildings cannot exceed 3m in height, eaves height cannot exceed 2.5m, any part of the development within 2m of a boundary cannot exceed 2.5m in height, and any part within 2m of the house cannot exceed 1.5m in height.
These permitted development rules apply to houses, not flats, maisonettes or other buildings. There are also restrictions for conservation areas, National Parks, areas of outstanding natural beauty, listed buildings, raised platforms and properties where permitted development rights have been removed. Check the current guidance before you build, especially if you are close to a boundary, near the house, in a conservation area, or working on a listed property.
For a practical pent-roof shed, the aim is usually simple: keep the roof high enough to be useful inside, but do not push the height so close to the limit that a sloping garden, raised base or measurement error creates a problem. Measure from the actual ground level around the building, not just from the floor frame.
Choose the base before you build the floor
The base decides whether the shed stays square. Do not sit the timber floor frame directly on soil. Even treated timber should not be left sitting in wet ground where water can constantly soak into it.
| Base option | Best for | What to watch |
|---|---|---|
| Concrete slabs | Simple domestic garden sheds where the ground is already fairly firm. | The slabs need to be well supported, level and not rocking. Do not bridge gaps with a weak floor frame. |
| Concrete blocks on compacted gravel | Better drainage and easier levelling on uneven gardens. | Set support points carefully so the floor joists are supported properly and the frame cannot twist. |
| Treated timber bearers or skids | A practical timber base where you want airflow and separation from the ground. | Bearers still need to sit on something firm and draining. Keep timber away from standing water and soil contact where possible. |
If you are unsure where to spend the extra effort, spend it on the base and floor. A neat wall can be adjusted. A badly supported floor makes the whole shed feel wrong.
Use structural treated timber, not CLS
For this shed, use structural treated timber for the main frame. CLS is often used for internal studwork, but it is not the right product to push for an external garden shed frame in this guide. The shed needs a frame that makes sense outdoors.
For most garden shed framing, think in three areas:
- Floor frame: minimum 100x47mm / 4x2 structural treated timber, with 150x47mm / 6x2 where a stronger floor is sensible.
- Wall frames: structural treated timber sized to suit the shed height, cladding and door layout.
- Roof rafters: structural treated timber sized to suit the span, roof deck, roof covering and overhang.
Use the same thinking as a small framing job: the floor carries the load, the walls need to stay square, and the roof needs proper fall and support. Do not choose timber purely because it is the smallest size you can make fit on paper.
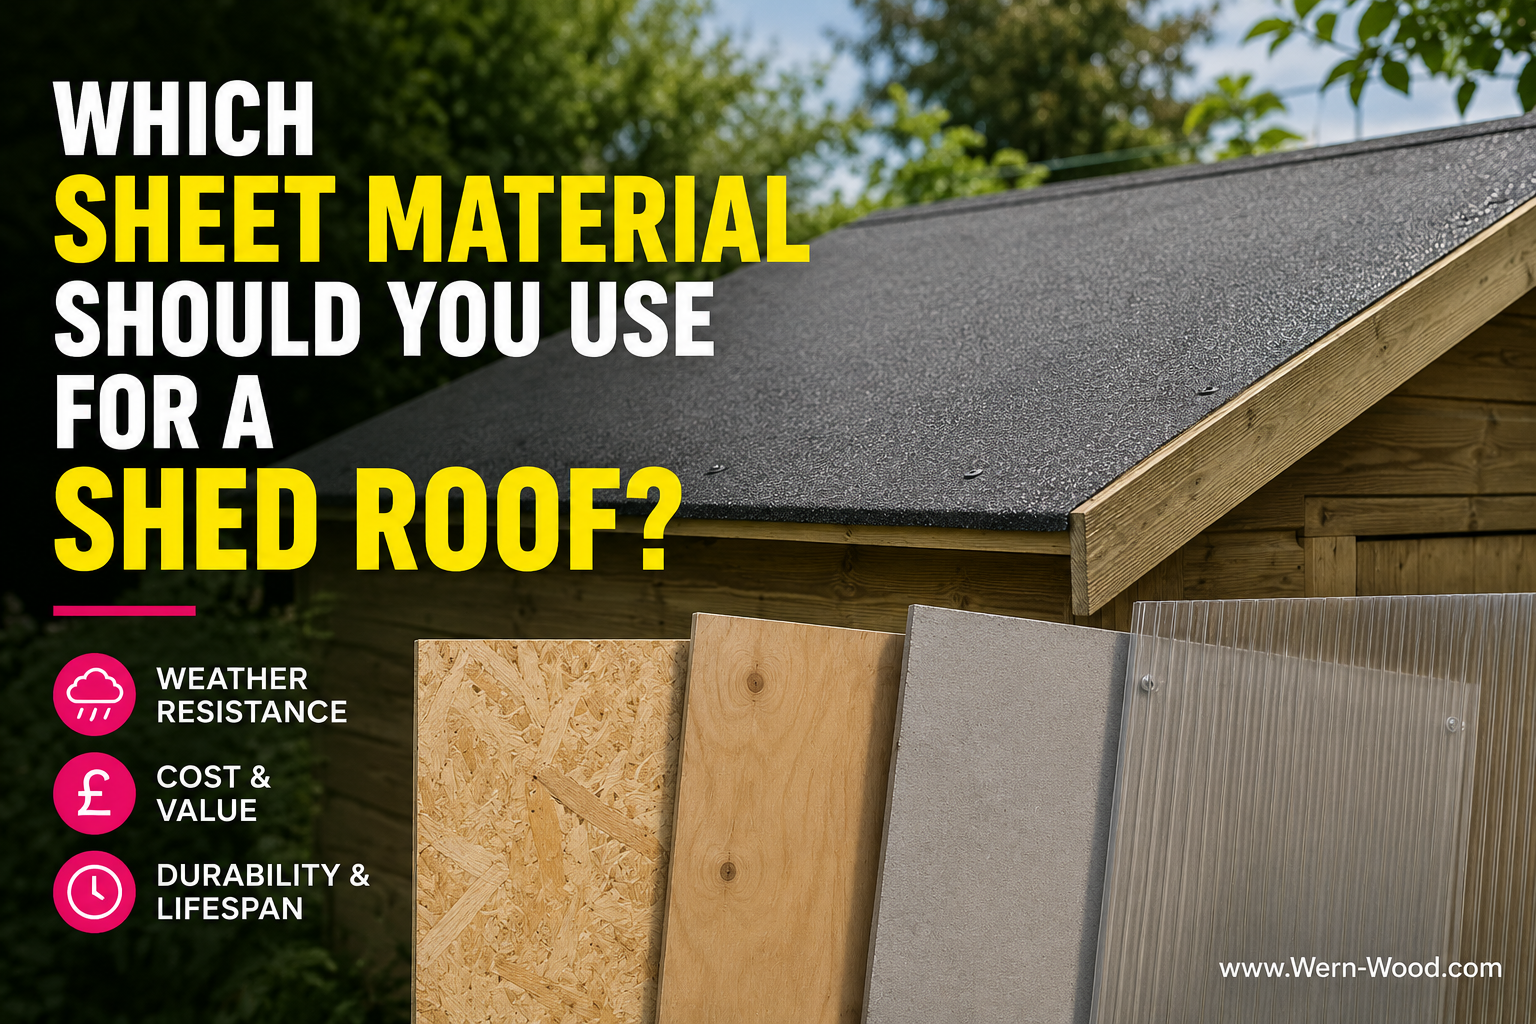
Sheet materials: OSB3 first, plywood where suitable
For the floor deck and roof deck, OSB3 sheets are the expected choice for this type of project. OSB3 is commonly used for shed floors, roof decks and general construction projects where a structural sheet is needed in humid conditions.
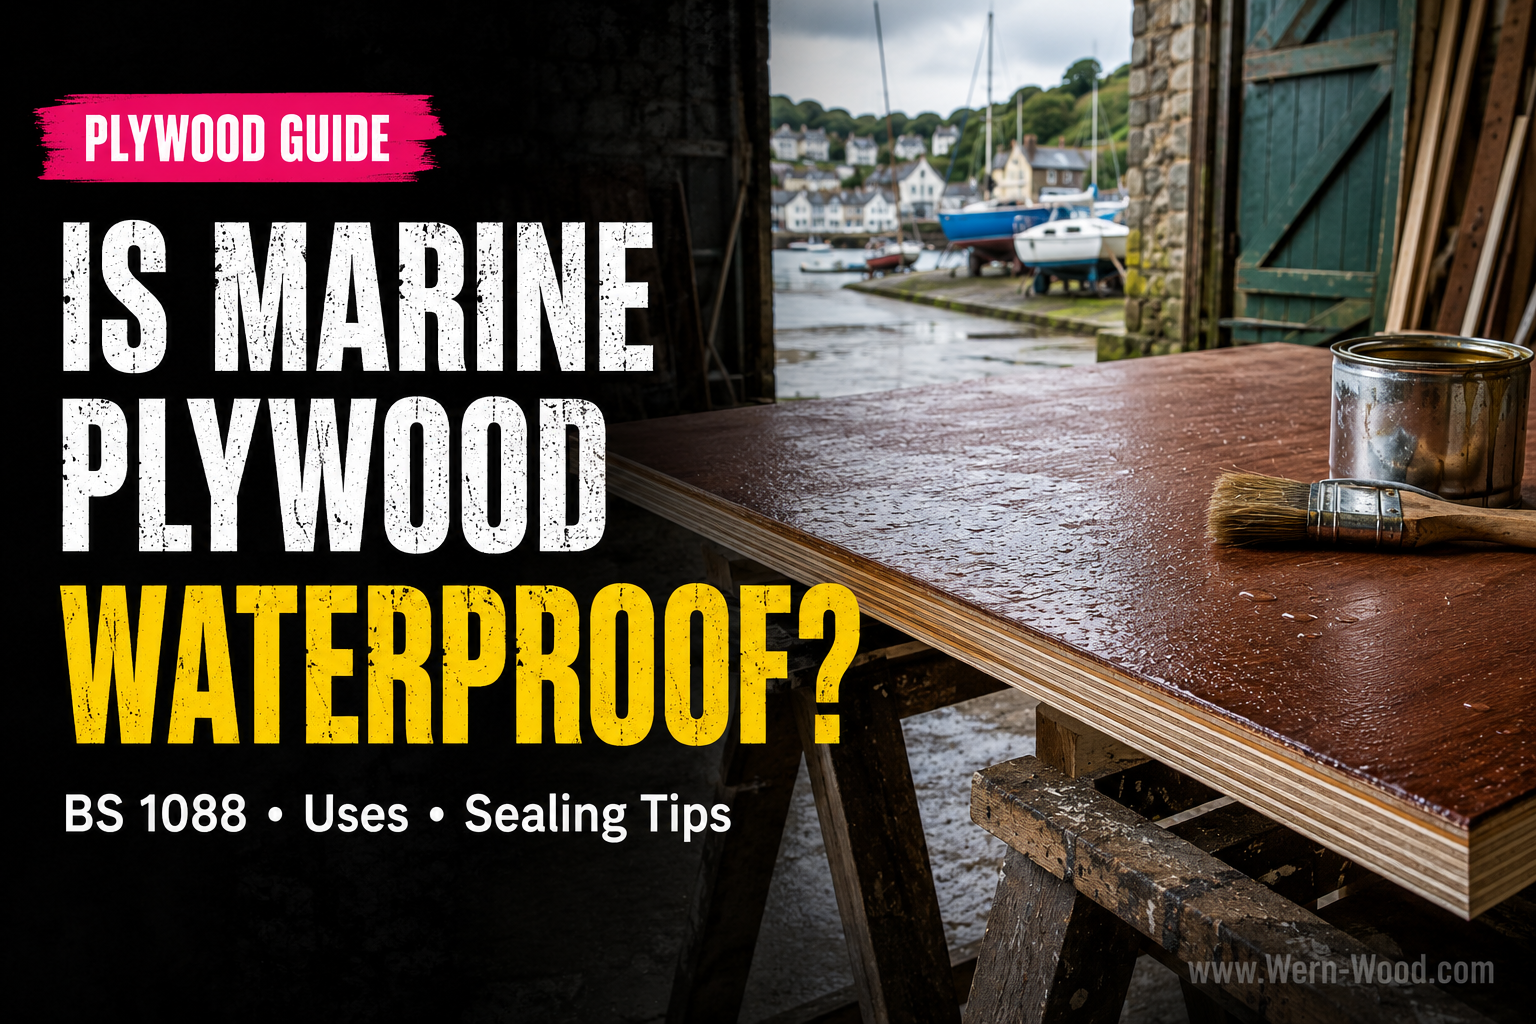
Plywood may also be suitable for some shed floors or roofs, depending on the specific sheet, thickness, exposure and protection. If you are using shuttering ply or another plywood sheet option, check the product specification before treating it as a like-for-like OSB3 replacement.
OSB3 is not a magic waterproof layer. It still needs sensible detailing, roof covering, protected edges and good shed ventilation. Do not leave sheet edges exposed to weather and expect them to last.
Cutting and sanding timber, OSB and plywood can create harmful dust. Work outside or in a well-ventilated area where possible, avoid breathing dust, and use suitable eye protection and respiratory protection when cutting or sanding. HSE guidance treats wood dust as a serious health risk, especially when power tools are used.
Cladding options that make sense
The outside finish can be adapted depending on the look you want and the products you prefer to use. The main options are:
| Cladding type | Why use it | Planning note |
|---|---|---|
| Shiplap | Clean shed-style finish with a practical overlap profile. | Work from the bottom up and follow the correct orientation for weather shedding. |
| Loglap | Chunkier garden-building look. | Allow for the finished coverage of the board, not just the total board width. |
| Tongue & groove | Neater boarded appearance and useful for doors or wall cladding. | Do not trap water in the profile. Follow the board orientation and treatment guidance. |
| Featheredge | Good practical option where longer lengths suit the shed wall height or layout. | Plan the overlap and fixing pattern before calculating quantities. |
You can browse the main timber cladding range, including shiplap, loglap and tongue and groove options. For featheredge-style shed cladding, see treated featheredge boards.
Material planning method
Instead of pretending one shopping list fits every shed, use this method. It helps you plan the job properly and adjust for your chosen size, board length and cladding type.
1. Floor frame timber
Start with the outside floor size. For a 6x8ft-style shed, that might be around 1.8m x 2.4m. Plan two long rim joists, two end joists, and internal joists at sensible centres. For a shed floor, closer joist spacing gives a firmer feel, especially if you are storing heavy garden tools.
Use at least 100x47mm / 4x2 structural treated timber for the floor. If you are storing heavier items or want a stiffer floor, step up to 150x47mm / 6x2.
2. Wall frame timber
Draw each wall as a rectangle before you cut. Mark the bottom plate, top plate, corner studs, intermediate studs and door opening. For the front wall, mark the door first, then work out the studs either side. This is easier than building a full wall and trying to cut the opening afterwards.
For a central door, keep enough timber either side of the opening so the front wall is not weak. If moving the door to one side, keep the hinge side well supported and leave enough frame around the latch side.
3. Roof timber
A pent roof needs a clear high side, low side and fall direction. In this guide, the roof falls from the front down to the back. Plan enough rafters to support the OSB3 roof deck and allow a modest overhang to help throw water away from the walls.
The higher you make the shed, the more carefully you need to check the planning height and boundary position. Do not just add height because it feels useful inside.
4. Sheet materials
Most sheet materials are planned around 2440mm x 1220mm sheet sizes. For a 2.4m x 1.8m-style shed floor, think about where each sheet joint will land. If a joint falls between joists, add support. Do the same on the roof deck.
As a rule, do not leave sheet joints unsupported and do not rely on a roof covering to hide a weak roof deck.
5. Cladding
Do not calculate cladding from the total board width alone. Calculate from the effective coverage once the overlap or tongue-and-groove profile is installed. Measure the wall area, subtract the door opening if useful, then divide by the effective board coverage. Add sensible waste for cuts, mistakes and awkward ends.
6. Fixings and hardware
You will need framing screws, sheet screws or nails, cladding nails, roofing felt fixings, hinges, latch hardware, and possibly fascia or trims. Browse timber fixings, nails and ironmongery before you start so the build does not stop halfway through for missing basics.
Example cut planning for a 6x8ft-style shed
This is not a fixed shopping list. It is a planning example to help you understand the frame before adapting it to your chosen size.
| Part | Example planning method | Product direction |
|---|---|---|
| Floor perimeter | Two long rim joists and two end joists cut to your finished floor size. | 100x47mm / 4x2 structural treated timber minimum. |
| Floor joists | Internal joists cut to fit between the perimeter timbers, spaced to give a firm floor. | 100x47mm / 4x2, or 150x47mm / 6x2 for a stronger floor. |
| Floor deck | OSB3 sheets planned so joints land on joists or added support. | OSB3 sheets, with plywood only where the chosen sheet is suitable. |
| Front wall | Bottom plate, top plate, corner studs, door studs and intermediate studs. | Structural treated timber. |
| Back wall | Lower wall frame to create roof fall from front to back. | Structural treated timber. |
| Side walls | Sloping top line between the high front wall and lower back wall. | Cut carefully after confirming the real front and back wall heights. |
| Roof rafters | Rafters running from front to back, with enough overhang to help shed water. | Structural treated timber sized to suit span and roof deck. |
| Roof deck | OSB3 sheets fixed to rafters, with joints supported. | OSB3 roof sheets plus shed felt or suitable roofing membrane. |
| Door | Framed ledge-and-brace door sized after the opening is built square. | Structural treated timber plus cladding boards and hinges. |
Step-by-step build method
Step 1: Set out the base
Mark the shed footprint using pegs, string or spray marker. Check the diagonals to make sure the shape is square. Prepare your chosen base: slabs, blocks on compacted gravel, or treated bearers/skids supported off wet ground.
Take your time here. A few millimetres of twist in the base can become a door problem later.
Step 2: Build the floor frame
Cut the floor perimeter from structural treated timber. For a good shed, use 100x47mm / 4x2 as the minimum starting point. Step up to 150x47mm / 6x2 if the shed is carrying more weight, spanning between fewer supports, or you simply want a stiffer floor.
- Lay out the perimeter timbers on the base.
- Fix the corners square.
- Add internal joists at sensible centres.
- Check diagonals before fully tightening everything.
- Set the frame onto the base and check that it does not rock.
Do not rely on your eye. Measure the diagonals. If both diagonal measurements match, the frame is square. If they do not match, push the long diagonal shorter until the frame comes square.
Step 3: Fit the floor sheets
Lay the OSB3 sheets over the floor frame and plan the joints before fixing. Sheet edges should land on joists or added noggins. Leave a small expansion gap where needed and avoid forcing sheets tightly together.
Mark joist lines on the top face of the sheet before fixing. This helps you drive screws into timber rather than guessing through the board.
Step 4: Frame the back wall
The back wall is the low side of the pent roof. Build it flat on the shed floor if possible. Use a bottom plate, top plate, corner studs and intermediate studs. Keep the frame square before standing it up.
Brace the wall temporarily once raised. Do not leave freestanding wall frames unsupported in wind.
Step 5: Frame the front wall with the central door
The front wall is the high side of the pent roof. Mark the central door opening first. Then add door studs, corner studs, intermediate studs and a header above the door.
The door opening should be square, not just the right width. Check the diagonals of the opening if needed. A shed door is far easier to hang when the opening is right from the start.
If you want to move the door to one side, do it on the drawing before you cut timber. Offset doors can make the inside more useful because one wall becomes better for shelves or long tools, but the door side still needs proper framing and enough fixing strength for the hinges.
Step 6: Build the side walls to suit the roof fall
The side walls connect the higher front wall to the lower back wall. That means the top of each side wall follows the roof slope. Do not guess this angle early. Confirm your front and back wall heights, then mark the slope accurately.
For a confident beginner, the cleanest method is to build the side wall frame carefully rather than trying to hide rough cuts later. Mark the top line, cut neatly, and keep checking that the frame sits flat and square.
Step 7: Tie the wall frames together
Stand the walls, check plumb, and fix the corners together. Fix the bottom plates down into the floor frame. Use temporary braces while you work. The shed should now feel like one box rather than four separate panels.
Before fitting the roof, check:
- The front wall is straight.
- The back wall is straight.
- The corners are pulled together properly.
- The door opening is still square.
- The roof fall runs the correct way.
Step 8: Fit the pent roof rafters
Run the rafters from the high front wall to the low back wall. Allow a sensible overhang to help throw water away from the cladding. Space the rafters so the roof deck is supported and sheet joints can land properly.
Once the rafters are in place, sight across them. Twisted or uneven rafters make the OSB3 roof deck harder to fix and can leave the felt sitting badly.
Step 9: Deck and cover the roof
Fit OSB3 sheets to the rafters, keeping joints supported. Once the roof deck is fixed, cover it promptly. Do not build the roof deck and leave it exposed to rain.
For a simple shed, use shed felt or a suitable roofing membrane following the product instructions. Work with the roof fall, overlap correctly, and make sure the edges are detailed so water does not run back into the timber.
Even a small shed roof can put you in an awkward working position. Use suitable access equipment, keep the ground clear, and do not work from an unstable ladder or step. Avoid roofing work in high wind or rain.
Step 10: Clad the walls
Fit the cladding after the shed frame is square and the roof is protected. Work from the bottom up where the profile requires it. Keep boards level, fix into studs, and check the product orientation so water sheds correctly.
For shiplap, loglap or tongue and groove, use the effective coverage of the board when planning quantities. For featheredge, allow for the overlap. Treat cut ends where needed and avoid leaving exposed cuts unprotected.
Step 11: Build and hang the door
Build the door to the finished opening, not just the drawing. A simple framed ledge-and-brace door works well for this shed. The door needs solid fixing points for hinges and enough clearance to move without rubbing.
Brace direction matters. The diagonal brace should support the latch side back towards the hinge side so the door resists sagging. Fit the hinges into solid timber, pack the door evenly in the opening, and test swing before final fixing.
Step 12: Add trims, fascia and final protection
Finish the corners, roof edges and exposed cuts. Fascia and trims are not just cosmetic; they help cover vulnerable edges and make the shed look intentional rather than unfinished.
Once the shed is built, apply a suitable exterior treatment or paint system as required by the products used. Pay attention to cut ends, lower boards, door edges and anywhere water could sit.
Before you order checklist
- Have you chosen the shed position and checked drainage?
- Have you checked planning limits for your property, boundary position and area?
- Have you chosen your base type: slabs, blocks/gravel or treated bearers?
- Have you planned the floor frame using at least 100x47mm / 4x2 structural treated timber?
- Do you need 150x47mm / 6x2 for a stronger floor?
- Have you drawn the front wall and door opening before cutting timber?
- Have you allowed for the real cladding coverage, not just the board width?
- Have you planned where OSB3 sheet joints will land?
- Have you included roofing felt or membrane, fixings, nails, hinges and latch hardware?
- Have you checked delivery access for long timber and sheet materials?
Useful Wern-Wood categories for this build
| Part of the shed | What to browse |
|---|---|
| Floor, walls and roof frame | Structural treated timber |
| General treated timber options | Treated sawn timber |
| Floor deck and roof deck | OSB3 sheets |
| Alternative sheet material | Plywood sheets |
| External shed finish | Timber cladding |
| Featheredge shed cladding option | Featheredge boards |
| Roof covering | Roofing membrane and shed felt |
| Screws and fixings | Timber fixings |
| Nails and clout nails | Nails |
| Hinges, latches and bolts | Ironmongery |
Common mistakes that make sheds fail early
- Using too-light timber for the floor: the floor feels weak and the shed twists more easily.
- Building directly on soil: timber stays wet and the base moves.
- Guessing the roof fall: water does not clear properly and roof edges become vulnerable.
- Unsupported sheet joints: OSB3 edges flex, lift or weaken.
- Forgetting the door until the end: the opening is slightly out of square and the door becomes a fight.
- Calculating cladding from total board width: you run short because overlap and profile coverage were ignored.
- Skipping cut-end protection: the most exposed areas are often the weakest points.
FAQs
Is this shed guide suitable for a complete beginner?
It is suitable for someone with basic framing confidence: measuring, cutting, drilling, checking square and following a plan. It is not ideal as a first-ever DIY job if you have never built a simple frame before.
Can I build the shed from CLS?
This guide does not recommend CLS for the main outdoor shed frame. Use structural treated timber for the floor, walls and roof frame. CLS is more commonly pushed for internal studwork, not this type of external shed build.
What size timber should I use for the shed floor?
Use 100x47mm / 4x2 structural treated timber as the minimum starting point. If the shed will carry heavier storage, span further between supports or needs a stiffer floor, use 150x47mm / 6x2.
Can I use OSB3 for the shed floor and roof?
Yes, OSB3 is a common choice for shed floors and roof decks, provided it is properly supported, protected and detailed. Do not leave it exposed to weather and do not leave sheet joints unsupported.
Is plywood suitable instead of OSB3?
Plywood may be suitable in some shed projects, but it depends on the specific sheet, thickness, exposure and protection. Check the product specification before using plywood as a replacement for OSB3.
Should the shed door be central?
A central door is simplest and works well for a general storage shed. Move it to one side if you want more continuous wall space inside, but plan the wall frame around the opening before cutting timber.
Can the shed sit directly on soil?
No. Use slabs, blocks on compacted gravel, or treated bearers/skids supported properly. The shed needs a level base and separation from wet ground.
Do I need planning permission for a garden shed in Wales?
Many domestic outbuildings are permitted development if they meet the limits and conditions, but you must check your own property. Height, boundary distance, conservation areas, listed buildings and previous planning restrictions can all matter.
Final thought: build the shed around the weak points
A shed is not complicated, but it is unforgiving if the basics are rushed. Get the base level, make the floor strong, use structural treated timber, keep the frame square, support the OSB3 properly, and plan the roof fall before you start cutting. That is what makes a garden shed feel solid rather than temporary.
Start with the frame and sheet materials, then choose the cladding and roof covering that suits the finish you want.
Planning a timber shed build?
Browse structural treated timber, OSB3 sheets, cladding, roofing felt, fixings and ironmongery online, or visit the yard in Briton Ferry if you want help choosing the right materials before you start.
Shop Structural Treated Timber → Order online or collect from our Briton Ferry yard. Yes, we deliver.General guidance only. Always check product specifications, manufacturer instructions, ground conditions, local planning restrictions and safe working practices before building. For unusual sites, heavy loads, electrical work, habitable conversions or boundary-sensitive projects, seek competent advice before starting.