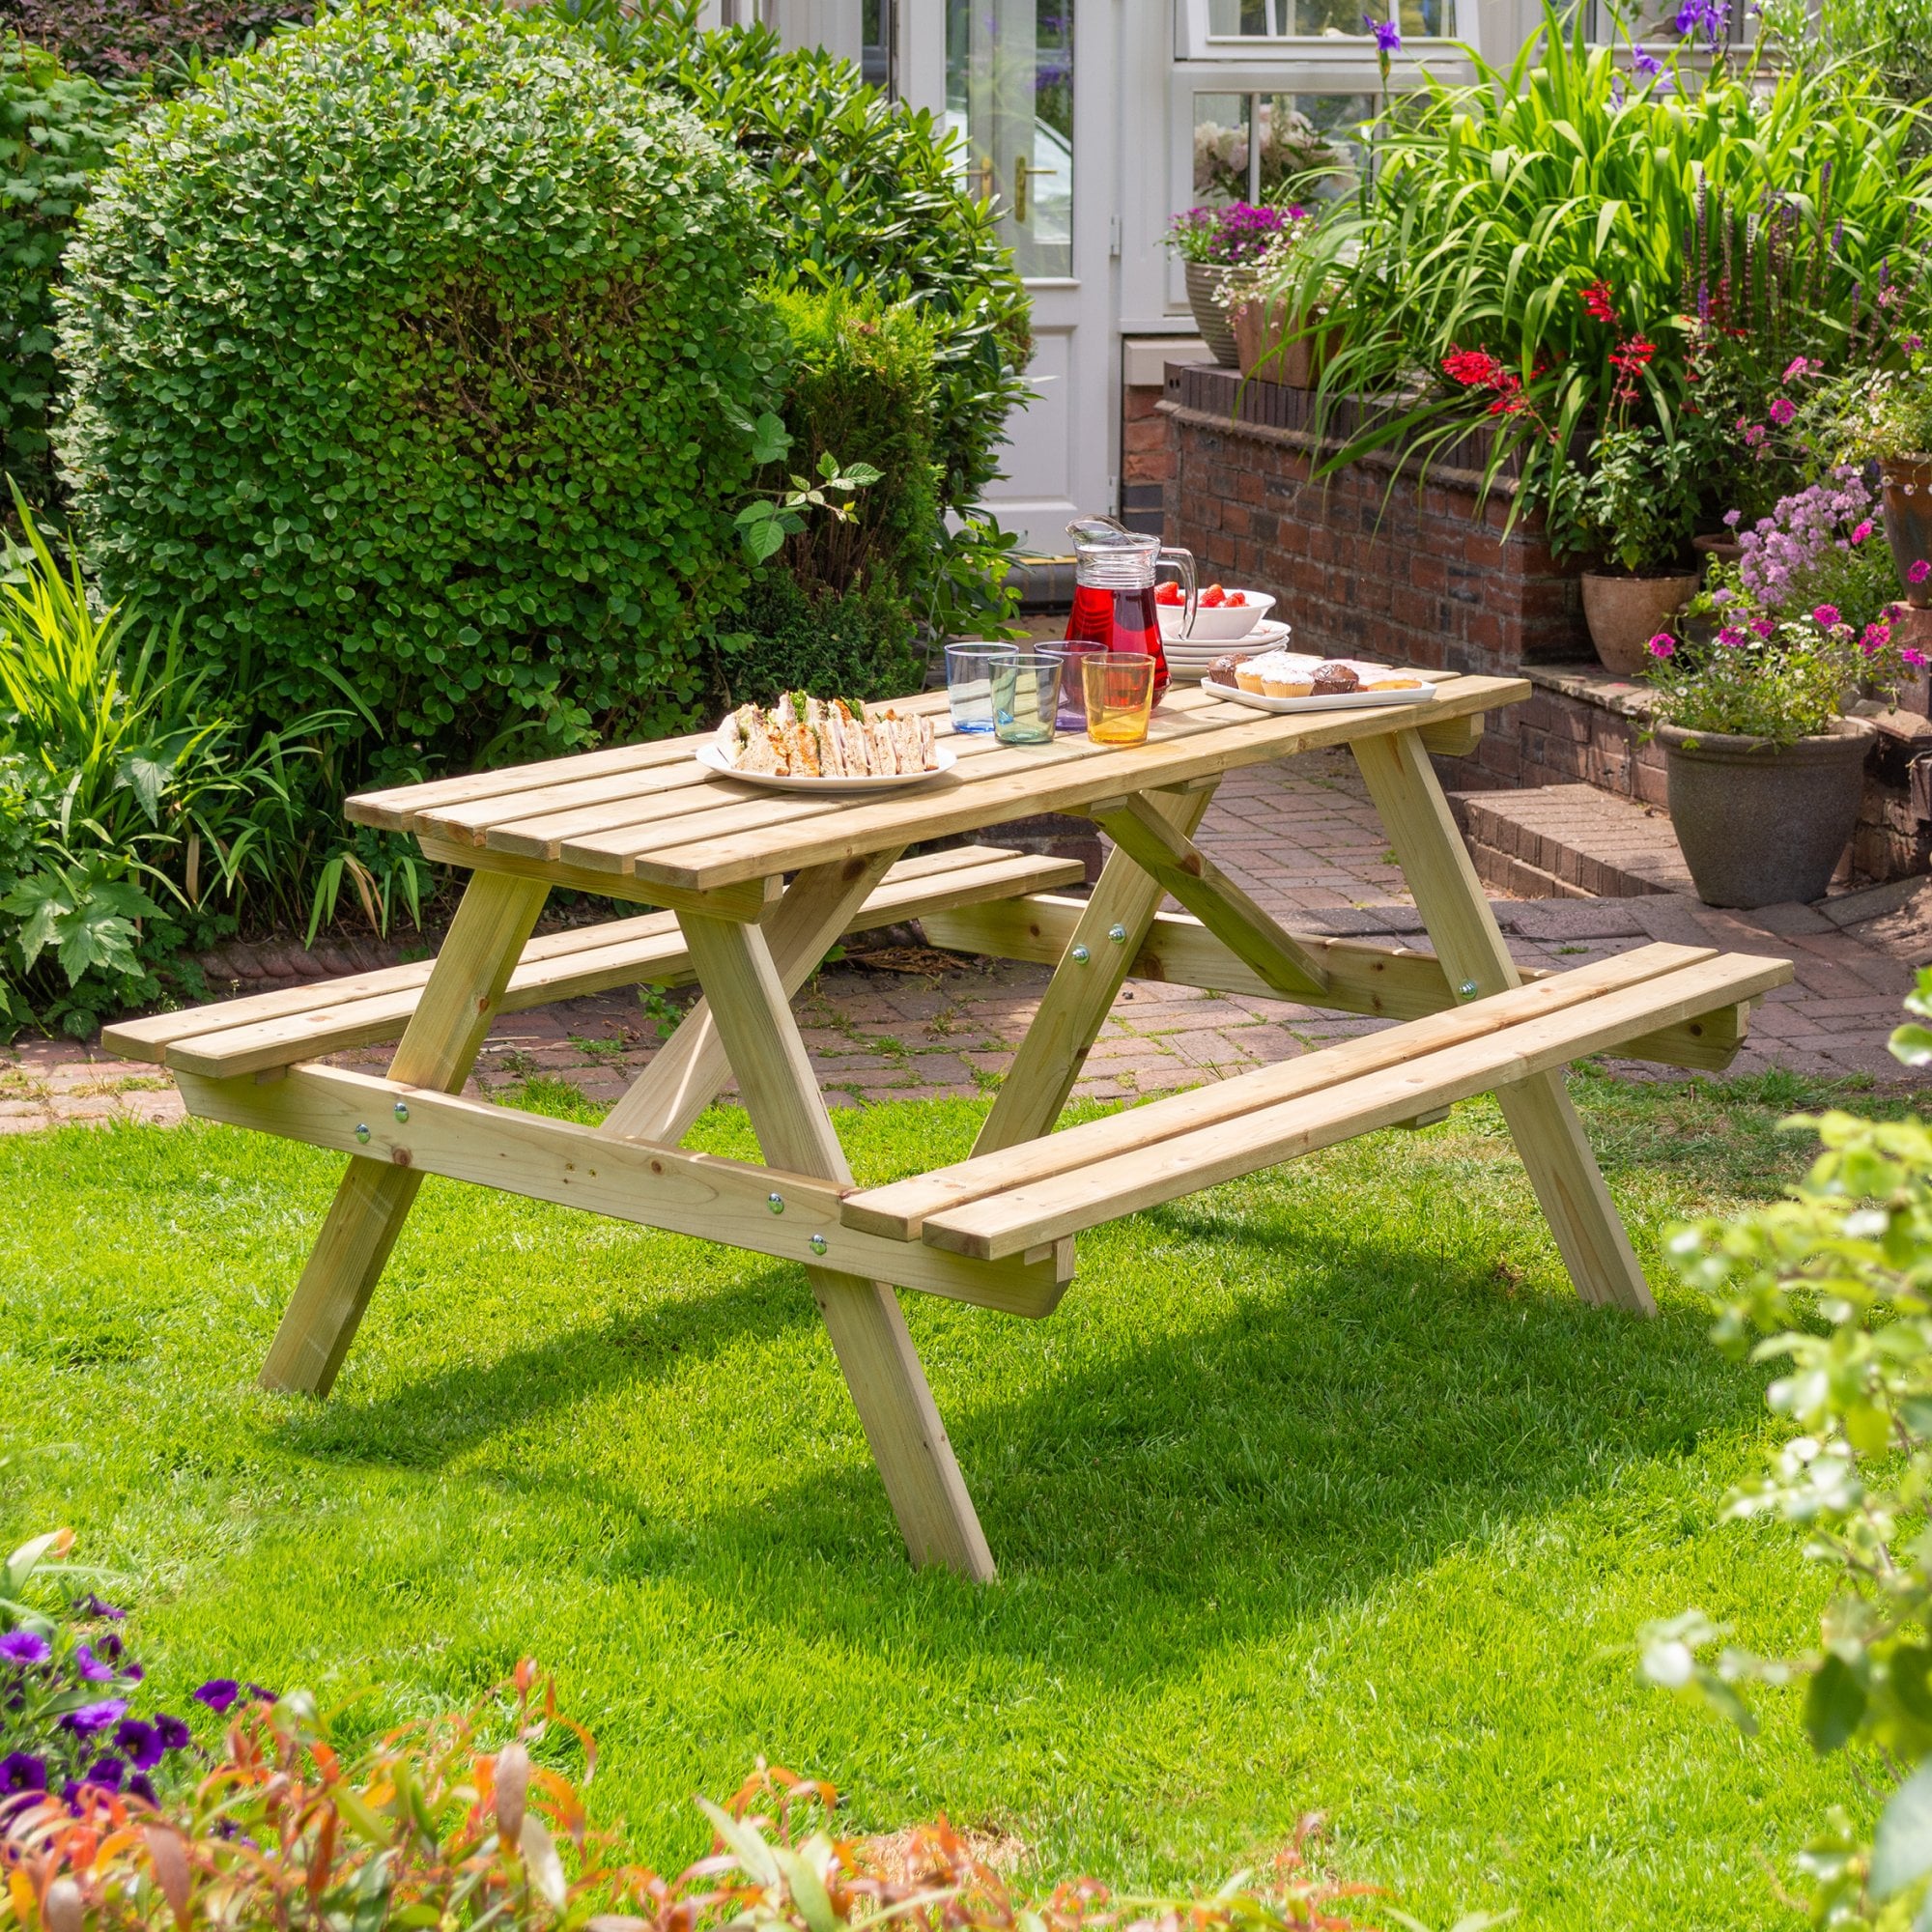
Build a Picnic Table That Doesn’t Wobble, Tip or Feel Like a Pallet Project
A good timber picnic table needs more than boards screwed together. Use structural treated timber, build two square A-frame leg assemblies, bolt the load-bearing joints, leave drainage gaps between the top boards, and brace the table so it cannot rack sideways. This guide uses a simple 1800mm six-seater design for confident beginners with basic measuring, cutting and drilling skills.
A picnic table is one of those garden projects that looks simple until people sit on it. If the legs are guessed, the fixings are too light, the seats are poorly supported, or the frame has no bracing, the finished table can wobble, twist or feel uncomfortable.
This guide keeps to one design: a simple classic A-frame picnic table around 1800mm long. It is designed as good practical garden furniture, not the cheapest possible build and not an overbuilt pub-table specification. The aim is a strong, usable table that a confident beginner can build with care.
- Simple A-frame design
- 1800mm long worked example
- Structural treated timber
- Six-seater garden table
- Bolted load-bearing joints
- Proper bracing
This guide is for a domestic garden picnic table. It is not a specification for public playgrounds, schools, pubs, parks, commercial seating areas or accessible public furniture. If the table will be used in a public, commercial or high-risk setting, use a suitable specification and competent advice.
What timber should you use?
For this build, use structural treated timber. It gives the table a stronger, more sensible frame than lightweight decorative timber, and it is a practical route for outdoor garden furniture.
Use wider structural treated boards for the tabletop and seats, and smaller structural treated sections for legs, cross supports and braces. The exact sizes available may vary, so use the cut list as a build method and adapt it to the closest suitable timber section.
Outdoor timber treatment helps timber survive outside, but always follow the product guidance for any additional oil, stain or finish used on a picnic table. Allow finishes to dry and cure fully before the table is used for food, drinks or children’s activities. Do not use indoor-only finishes outdoors.
Target finished dimensions
Before cutting timber, understand what the table is aiming for. These dimensions give a comfortable domestic garden table without making the project too complicated.
| Part | Target size | Why it matters |
|---|---|---|
| Overall length | 1800mm | Practical six-seater length for a garden picnic table. |
| Tabletop height | About 730–760mm | Comfortable table height for most adults. |
| Seat height | About 430–460mm | Comfortable bench height for sitting and standing up. |
| Tabletop width | About 700–800mm depending on board width | Wide enough for plates and drinks without becoming awkwardly large. |
| Seat width | Two boards per side | More comfortable and stable than a single narrow seat board. |
Materials and tools
Materials
- Structural treated timber for tabletop, seats, legs, supports and braces
- Exterior-rated coach bolts, washers and nuts for leg and support joints
- Exterior structural screws or suitable wood screws for boards and secondary fixings
- Suitable exterior timber finish, oil or stain if required
For the core timber, browse structural treated timber. For fixings, browse timber fixings and ironmongery.
Tools
- Tape measure
- Pencil
- Square
- Saw or circular saw
- Drill/driver
- Drill bits for pilot holes and bolt holes
- Spanner or socket set
- Clamps
- Sander or sandpaper
- Eye protection and dust protection
Cutting and sanding timber can create harmful dust, especially with power tools. Work outside or in a well-ventilated area where practical, clamp timber securely, avoid breathing dust, and use suitable eye protection and respiratory protection.
Cut list for a 1800mm A-frame picnic table
This cut list is designed around common structural treated timber sizes. Use 47x150mm structural treated timber for the tabletop and seat boards where available, and 47x100mm structural treated timber for legs, supports and braces where suitable.
Some angled parts should be marked in place. That is not a shortcut; it is the more accurate method because real timber widths, gaps and finished height can vary slightly.
| Part | Quantity | Suggested timber | Cut length | Notes |
|---|---|---|---|---|
| Tabletop boards | 5 | 47x150mm structural treated timber | 1800mm | Leave small drainage gaps between boards. |
| Seat boards | 4 | 47x150mm structural treated timber | 1800mm | Two boards per side gives a more comfortable bench. |
| Tabletop cross battens | 3 | 47x100mm structural treated timber | About 650–700mm | Cut to suit finished tabletop width, set in from board edges. |
| A-frame legs | 4 | 47x100mm structural treated timber | 850–900mm blanks | Cut long, then mark and trim angles in place to hit final table and seat height. |
| Seat support rails | 2 | 47x100mm structural treated timber | 1600mm | Run lengthways under the seat boards, set in from the ends. |
| Lower stretcher | 1 | 47x100mm structural treated timber | 1500–1600mm | Runs lengthways between the A-frame assemblies to reduce racking. |
| Diagonal braces | 2 | 47x100mm structural treated timber | Measure in place | Brace between the table frame and lower stretcher/seat support area. |
The legs and braces decide whether the table sits flat and feels solid. Marking those angles in place is more reliable than copying a random angle from a plan, especially if your timber width, tabletop gap or finished seat height changes.
Step-by-step build method
Step 1: Set out the tabletop
Lay the five tabletop boards upside down on a flat surface. Keep the best faces down if you are assembling from the underside. Leave small, even gaps between the boards so rainwater can drain away instead of sitting between them.
Square the ends and clamp the boards together. Measure the full tabletop width before cutting the underside battens to final length.
Step 2: Fix the tabletop cross battens
Fit three cross battens underneath the tabletop: one near each end and one in the centre. Set the end battens in from the ends rather than placing them right on the edge.
Pre-drill and screw through the battens into the underside of each tabletop board. Use exterior-rated fixings and avoid screws that are too long for the combined timber thickness.
Mark the centreline of each tabletop board across the battens before fixing. This keeps the screw pattern tidy and helps prevent missed fixings.
Step 3: Plan the A-frame leg position
The picnic table stands on two A-frame assemblies, one near each end. Each assembly uses two angled legs. The legs need to support the tabletop and carry the seat support rails.
Do not guess the leg angle. Set the tabletop upside down, position the leg blanks against the underside battens, and adjust until the finished tabletop height and seat height make sense. Aim for the tabletop to finish around 730–760mm high and the seat boards around 430–460mm high.
Step 4: Cut and bolt the legs
Once the leg angle is marked, cut the leg ends so they sit neatly against the underside of the tabletop structure and sit flat on the ground. Repeat carefully so both A-frame assemblies match.
Drill bolt holes through the legs and fixing points. Use coach bolts with washers and nuts for the main leg joints. Tighten firmly, but do not crush the timber fibres by overtightening.
Do not rely only on light screws for the main A-frame leg joints. People will sit on the benches and lean on the table. Use proper bolts, washers and suitable exterior fixings for the load-bearing parts.
Step 5: Fit the seat support rails
The seat support rails run lengthways along each side of the table and carry the bench boards. Set them at a comfortable height, usually around 430–460mm finished seat height once the seat boards are fitted.
Check both seat support rails are level with each other and parallel to the tabletop. Bolt or securely fix them through the A-frame leg assemblies. If one side is lower, the table will feel wrong immediately.
Step 6: Fit the lower stretcher
A lower stretcher running lengthways between the two A-frame assemblies helps stop the table racking and twisting. Fit it centrally and securely between the frames.
This is one of the pieces that makes the table feel like proper garden furniture rather than a loose pile of boards.
Step 7: Add the diagonal braces
Diagonal braces reduce wobble and side movement. Offer each brace into place, mark the angles, then cut and fix neatly. Measure these braces in place rather than cutting them from a guessed length.
The table should now feel stiff before the seat boards are fitted. If it still rocks or twists badly, correct that now before adding more weight.
Step 8: Fit the seat boards
Fit two seat boards to each side. Keep the boards parallel to the tabletop and leave a small gap between the two boards so water can drain.
Use exterior-rated screws and pre-drill near board ends. Check that the screw heads sit flush and do not leave sharp edges where people will sit.
Step 9: Turn the table over and check stability
With help, turn the table upright. Do not do this alone if the table is heavy or awkward. Set it on level ground and check all four feet sit properly.
If the table rocks slightly, check whether the ground is uneven before trimming timber. Test it on a flat surface if possible. If the frame itself is twisted, correct the bracing and leg fixings before using the table.
Step 10: Sand edges and corners
Round over sharp corners, exposed seat edges and tabletop edges. Remove splinters and rough patches, especially where hands, legs and clothing will touch the table.
Take extra care with the seat edges and tabletop corners. These are the places people notice poor finishing immediately.
Step 11: Protect the timber
Structural treated timber is designed for outdoor use, but a picnic table still benefits from sensible finishing and maintenance. Follow the guidance for any exterior oil, stain or treatment you choose.
Allow any finish to dry and cure fully before the table is used. If the tabletop will be used for food and drinks, follow the finish manufacturer’s instructions carefully and avoid using unsuitable coatings.
Before you order checklist
- Are you building the simple 1800mm A-frame design, not a different table style?
- Have you chosen structural treated timber for the main build?
- Have you allowed five tabletop boards and four seat boards?
- Have you included coach bolts, washers and nuts for the main frame joints?
- Have you included exterior-rated screws for boards and secondary fixings?
- Have you planned drainage gaps between tabletop and seat boards?
- Have you allowed time to mark leg and brace angles in place?
- Have you checked the target tabletop and seat heights?
- Have you planned sanding and edge rounding?
- Have you chosen a suitable exterior finish if you are finishing the table?
Useful Wern-Wood categories for this build
| Part of the picnic table | What to browse |
|---|---|
| Main timber for tabletop, seats, legs and frame | Structural treated timber |
| Alternative treated outdoor timber options | Treated sawn timber |
| Exterior screws and timber fixings | Timber fixings |
| Bolts, washers, nuts and hardware | Ironmongery |
Common mistakes that make picnic tables wobble
- Guessing the leg angle: mark the legs in place so the table reaches the right height and sits flat.
- Using light fixings for heavy joints: bolt the main A-frame joints rather than relying on small screws.
- Skipping the lower stretcher: the table is more likely to rack sideways.
- No diagonal bracing: the table may feel fine at first but loosen with use.
- No drainage gaps: water sits between boards and shortens the life of the table.
- Sharp edges and splinters: garden furniture needs proper sanding where people sit and lean.
- Using indoor fixings or finishes: outdoor furniture needs materials suited to weather exposure.
FAQs
Can I build this picnic table from structural treated timber?
Yes. Structural treated timber is the preferred route for this guide because it gives the table a strong, practical outdoor frame. Choose suitable sections for the tabletop, seats, legs and supports.
Why not use decking boards?
This guide deliberately uses structural treated timber rather than decking boards. Decking boards can introduce profile, groove and finish issues that are not needed for this simple A-frame picnic table.
Do I need coach bolts?
Use coach bolts, washers and nuts for the main A-frame and seat support joints. Screws are useful for boards and secondary fixings, but the main load-bearing joints need stronger fixing.
What height should a picnic table be?
For a domestic adult picnic table, aim for a tabletop height around 730–760mm and seat height around 430–460mm. Adjust carefully if the table is mainly for children or a specific use.
Should I leave gaps between the tabletop boards?
Yes. Leave small, even gaps so rainwater can drain. Tight boards trap moisture and make the table harder to keep dry.
Can I use this for a commercial beer garden or public seating area?
No. This is a domestic garden furniture guide. Public or commercial seating needs a suitable specification, risk assessment and competent advice.
Should I treat or stain the table?
You can use a suitable exterior timber finish if required. Follow the manufacturer’s instructions, allow it to dry and cure fully, and make sure it is appropriate for a picnic table surface.
Final thought: build the frame before judging the table
A picnic table is only as good as its frame. The tabletop and seats are the easy visible parts. The leg angle, bolts, stretcher, braces and support rails are what decide whether the table feels solid when people actually sit on it.
Use structural treated timber, mark the angles carefully, bolt the main joints, leave drainage gaps and sand every edge people will touch. That is what turns a simple garden project into a table worth keeping.
Building a timber picnic table?
Browse structural treated timber for the tabletop, seats, legs and frame, then pair it with suitable exterior fixings, bolts, washers and hardware for a strong garden build.
Shop Structural Treated Timber → Order online or collect from our Briton Ferry yard. Yes, we deliver.General guidance only. This article covers a domestic timber picnic table for private garden use. Timber sizes, fixings, ground conditions, intended load, finish choice and user needs can change what is suitable. For public, commercial, accessible or heavy-duty seating, use a suitable specification and competent advice.